
Fundamentals » Linux Commands » Quick scp Tutorial – Transfer Files Securely Over SSH
Table of Contents
- scp – Introduction
- Basic File Copy Using scp
- Copying Directories Using scp
- Authenticating With Keys and Custom SSH Port
- Bandwidth, Compression and File Attributes
- Remote-to-Remote Transfer
- Verbose and Quiet scp Modes
- scp Main Options Summary
- Common scp Examples – Pre-made commands
- Security Considerations
- Final Thoughts on scp
scp – Introduction
scp (short for Secure Copy) is a command used to transfer files securely between hosts over SSH.
It uses the SSH protocol for authentication and encryption.
It is commonly used for:
- Uploading files to a server
- Downloading files from a server
- Copying directories securely
- File transfers in scripts
We are going to see the main use cases and options.
Basic File Copy Using scp
The syntax of scp is very simple:
scp FILE_TO_COPY DESTINATION
Let’s see 2 examples:
Copy local file to remote host:
scp file.txt user@remote:/path/
Copy remote file to local machine (notice the “.” at the end that stands for “current folder” for the destination):
scp user@remote:/path/file.txt .
Example:

The remote syntax must follow this pattern:
user@host:/absolute/or/relative/path
The path can be relative.
So for instance, If I want to upload a backup file to my remote host in the /var/backups folder, I will use this command:
scp backup.tar.gz backupuser@192.168.1.100:/var/backups/
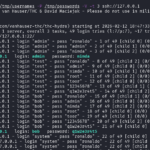
scp will ask for the password when I hit Enter, then the file will be uploaded.
And If I want to download a remote backup to my local backup folder:
scp backupuser@192.168.1.100:/var/backups/backup.tar.gz /home/backupuser/backups/
This will copy the remote backup.tar.gz file into my local /home/backupuser/backups folder.
Remember, the first argument is copied to the second argument. Therefore when the first argument is the remote file, we are downloading. If it’s the local file, we are uploading.
Copying Directories Using scp
We saw how to copy files, but we can also recursively copy directories using the -r option. Examples:
Upload a directory recursively:
scp -r folder2upload user@remote:/path/
Download a remote directory:
scp -r user@remote:/var/www/html /tmp/html
Authenticating With Keys and Custom SSH Port
Just like with the ssh command, we can specify the SSH private key to use with the -i option:
scp -i ~/.ssh/id_rsa file.txt user@remote:/path/
By default, port 22 is used for SSH connection. However, if the SSH service is running on another port, we can specify this port using the -P option. Example with the port 2222:
scp -P 2222 file2upload user@remote:/path/
Notice it’s an uppercase P. The lowercase p is another option that we describe below.
Bandwidth, Compression and File Attributes
The -l option allows us to set a bandwidth limit in Kbit/s:
scp -l 1000 bigfile.mp4 user@remote:/path/
It’s useful to avoid network saturation.
Another useful option is -C. It enables the compression during the file transfer:
scp -C largefile.tar user@remote:/path/
It only works for compressible data, and is ideal when the connection is slow.
Finally, we can preserve the file attributes when we copy files using the -p option. This will preserve the timestamps (modification and access times) and permissions:
scp -p file.txt user@remote:/path/
Remote-to-Remote Transfer
If we define 2 remote locations, scp will transfer file(s) between a remote host and another remote host:
scp user1@remotehost1:/home/user1/file.txt user2@remotehost2:/tmp/destination
In this case, our machine acts as intermediary (unless SSH agent forwarding or direct options are configured).
Verbose and Quiet scp Modes
Let’s see 2 additional options to end this tutorial.
The -v option enables the verbose mode (more output, useful for debugging):
scp -v file2upload user@remote:/path/
And the contrary of the -v option is the -q option, that enables the quiet mode (quiet output):
scp -q file2upload user@remote:/path/
scp Main Options Summary
| Option | Description |
|---|---|
| -r | recursive copy of folder(s) |
| -P | SSH port |
| -i | private key |
| -p | preverse timestamps and mode |
| -l | limit bandwidth |
| -v | verbose output |
| -q | quiet mode |
| -C | enable compression |
Common scp Examples – Pre-made commands
Upload a file to a server:
scp app.jar produser@server:/opt/app/
Download a remote backup:
scp backupuser@server:/var/backups/backup.sql .
Upload directory using a SSH private key and a custom port:
scp -r -i ~/.ssh/id_rsa -P 2222 html/ user@webserver:/var/www/
Transfer with compression and preserved attributes:
scp -C -p bigfile.tar.gz user@server:/data/
Security Considerations
Using scp:
- Data is encrypted through SSH
- SSH authentication methods are used (password or private keys)
- Host key verification protects against man-in-the-middle attacks
scp is secure and fast for simple file or directory transfers, however more advanced operations could require tools like sftp or rsync.
Final Thoughts on scp
scp commands are simple, the file transfers are secure.
As I said, for more advanced operations like synchronization, incremental transfers, or advanced filtering, rsync is more appropriate.
But for quick and secure copies, scp remains a great tool, especially during CTF when we get a SSH access or during pentest.
Enjoyed this post? Read more from PentestGuides:
- ftp Complete Tutorial in 10 Examples – Must-know Command for CTF
- scp Quick Tutorial – Transfer Files Securely Over SSH

- curl Quick Tutorial – Everything You Need to Know
- Netcat (nc) Full Tutorial – Easy TCP/UDP Guide
- nmap Tutorial – the Ultimate Network Scanner
- Hydra Tutorial – How to Effortlessly Brute-force Network Services
- Solving Lookup – TryHackMe Challenge Writeup

- Solving Basic Pentesting – TryHackMe Challenge Writeup

- RootMe Writeup – Full TryHackMe CTF Solution

- Corridor Writeup – TryHackMe IDOR Challenge

.
Disclaimer
All content published on this website is for educational purposes only.
The techniques, tools, and methodologies described here are intended to be used only on systems you own or have explicit permission to test.
I do not encourage or take responsibility for any illegal use of the information provided.